Okay so I am beyond super excited!!!!! With the help of my dad cutting the wood for me, I am making my very own Tufted Headboard. I will be using it as a photo prop but it will be a pleasure to admire!!!
As a young girl into my teenage years ( when daybeds were the must have), I had the most gorgeous velvet tufted headboard with matching duvet and shams. It started off red and over time and the sun through my skylight turned fuchsia. It was handed down to me from my dads cousin Maria and I was a very proud owner! We even passed it down to another relative.
Anyway I will post pics of my patterns, materials, list of materials and what not!
HAPPY CRAFTING!!!

~ family, photography, everyday life, crafts, cooking, baking, art, fashion, and a lot of this and that! ~
Thursday, April 4, 2013
Wednesday, February 6, 2013
crayons...what to do with all those broken pieces
I admit to being obsessed with crayons and colored pencils. My children are hard on their crayons, therefore they often break very easily.
So this project that Ive done with her is basically what kids did back in the 70's and 80's with bottle caps -- except we have made giant rainbow crayons!!!!
This project is not new for me, but this time around I used old plastic measuring cups in the microwave that will now serve as melting cups and molds. I started doing this after getting disgusted with my overly-used crafting only pot and pouring the hot wax.
Okay this is really easy and so much fun for the kiddies! Besides making way cool new crayons, your creating art! My daughter loved seeing the colors blending together (we even did some painting on thin wood with the melted crayon wax).
Here we go:
1. take the paper off your crayons (i use crayola- i like the texure better)
2. break the pieces in even smaller pieces (the tinier they are the easier they melt)
3. put them in whatever cup or bowl you are using and microwave them with a cover on (do this using small increments of time - think of melting crayons-- 30 seconds, check it do it for another 30) you have to keep checking, Ive had some ready in a minute and some in 40 seconds...you have to eye it.
THIS IS GOING TO BE SCORCHING HOT-- DO NOT LET THE KIDS TOUCH IT, IVE GOTTEN BAD BURNS FROM THIS MYSELF.
Next step is different for those using the measuring cup/mold combo and those using a bowl and then pouring into a mold.
4a. if you have melted th crayons in the measuring cup - let it dry completely! when its ready flip it over and tap the top until it come out.
4b. if you are pouring it into molds, quickly do so as it melts rather fast. when its dry pop it out
Wallah!!! funky beautiful new crayons that your kids can hold in their hands and they aren't easy to break!


**** I had to post this pic as well...this is what happened to my pot... do you see the flower????
Thursday, August 9, 2012
De plane! De plane! Stranger Islands Joanie Wolkoff welcomes you to her Oasis!

Stranger Islands . Joanie Wolkoff . www.strangerislands.com
AGE: 31.
HOMETOWN: Toronto, Canada.
CURRENTLY LIVES IN: Brooklyn, where she sings and co-writes for Stranger Islands.
How do you describe you own personal style?
SW: A harmonious blend of Dr. Quinn medicine woman and Tracy Lords!!!
LOL!!!! Who inspires you?
SW: A handfull of people that I know really well, and from a distance anyone who appears to be showing the rest of us how it’s done. I’m inspired by the way Annie Lenox, Christine McVie and Alla Pugacheva sang at the beginning of their recording careers. And I'm inspired by anyone who makes a living doing what they love!
What is your favorite beauty product?
SW: I/m so glad you asked because when I'm not fantasizing about natural disasters or the apocalypse I'm usually thinking about LIPSTICK & PERFUME!!!!!!!!
So then you must tell us what your faves are!
SW: My friend Jelena gave me a wonderful rose scented Anna Sui sheer lipstick that I have worn down to a nub. As the years go by I tend towards less shiny lip products but its good to do yourself up with a little gloss at night! I’ve decided that I cannot wear powder anymore...looks MORBID on me!!! I try to be honest and wear as little foundation as possible, but you will rarely see me without MAC concealer on my East European eye circles! I use to be loyal to one perfume for years at a time, but I went to the darkside and have a dozen!
Tell us about your ethnic background
SW: Speaking of Polish Pigmentation I am half Polish/Jewish, a quarter Danish and the rest is a Euro Stew!
A quick little piece of advice from you before we end this babySW: Eyes Peeled, Ears Open!
Thank you to my dearest Joanie for this interview! She is beautiful, talented and an amazing human being who I am proud to call my friend! xoxoxoxoxoxoxo Love You!
Jeannine
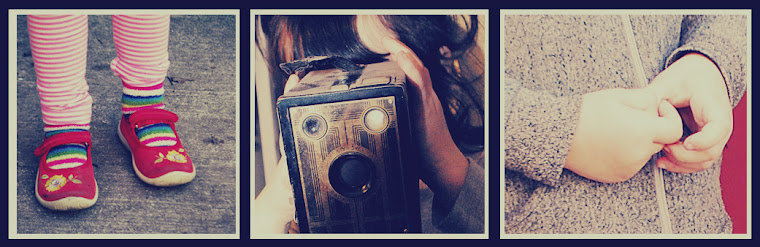
Our Photoshoot!


Building with bits & pieces!
building with bits & pieces
After 4 years of art college, sculpting was never my forte but I do enjoy gathering scraps and building something! I'm like a kid with Lego's!
Even though I constantly frequent antique shops, Home Goods and other home interior shops for great finds, I still find myself making home crafts! I wanted something for a mantel piece that I created myself. This what I ended up with:

WHAT I USED:
2 octagonal wood trays
an antique glass lamp
6 wooden dowels
twine rope
1/4 " sewing trim
an old finial
metallic paint in bronze and antique gold
Martha Stewart crackle
and my old reliable glue gun!
HAPPY CRAFTING!!!!!
Wednesday, August 8, 2012
A Crackle a day!
I have been obsessed with Martha Stewart Crackle paint for awhile now...using it is a habit that I cannot seem to kick!
Project 1:
Project 1:
The first project I want to share is my candlestick makeover!
I found this is my grandmothers house. They were silver and had crystals hanging but a few were missing so I completely got rid of them all together.

Here are my steps!
I painted a base coat of Martha Stewart Primer.
When dry I painted one light coat of crackle followed by a thicker coat in which I used a putty knife.
The next morning I used a dab of light metallic bronze paint mixed with varnish.
After it was completely dry I took a blade and scraped off some paint on the edges for a rustic feel.
I decided to replace the crystals that were missing with antique swarovski crystals from a chandelier that my mother once had.
Here is the end result:

Project 2:
My second project was a little more tedious and I found using the crackle more difficult than usual.
I had these cute pieces from Home Goods that I purchased maybe 10 years ago. I didn't want to abandon these so I left one the way it was and crackled the other. Here it is!
I used Martha Stewart texture paint as a base coat and then used the putty knife for the crackle. I put about 3 heavy layers on.

Subscribe to:
Posts (Atom)